Monday, 19 August 2019

WhatsApp Fingerprint Unlock Feature Now Available On Android Device

WhatsApp Fingerprint Unlock Feature Now Available On Android Smartphone

Not quite long WhatsApp launched the fingerprint unlock feature for  iOS smartphone users. Good news WhatsApp has also introduce such amazing feature for Android users, provided to download the latest version of the beta.

Android WhatsApp Fingerprint Unlock Feature
WhatsApp Fingerprint Unlock Feature.

The update is only available for Android users who have WhatsApp beta v2.19.221 installed on their device running Android M and above with a Fingerprint ID authentication support.

Editor's Pick : Checkout WhatsApp Latest update: Improved Change Number Feature

How To Check Who Reported You On Facebook

immediately the Fingerprint Authentication is turned on, the widget content will be hidden by default.

Android WhatsApp Fingerprint Unlock Feature

But users can still answer WhatsApp calls and reply to messages from notifications since the authentication of the fingerprint is only required when the user wants to open the app and access it.

How to Access And Setup Fingerprint ID for WhatsApp on Android

Open WhatsApp Settings (can be accessed by clicking the three dots present on top right corner) > Account > Privacy.

You will find a new option called ‘Fingerprint lock’ under ‘Privacy’.
Turn on ‘Unlock with fingerprint’ option to enable the feature.
Confirm the selection by touching the fingerprint sensor.


You Should Also Read : How To Set Up And Integrate Facebook Messenger On Blogger For Live Chat

Checkout The New Thankful Reaction Button Added To Facebook

WhatsApp Gets Fingerprint Authentication Feature

There are three options available for users to authenticate their identity; visible under ‘Automatically lock and includes options like ‘Immediately’, ‘After 1 minute’ and ‘After 30 minutes’.

The Fingerprint ID authentication feature is gradually rolling out to WhatsApp beta testers on Android and will arrive shortly to all.

Kindly share your experience in the comment box below once you get the new feature as a beta tester.

Never miss out any of this blog articles, Receive our regular updates by joining our mailing list, connect with us on facebook, follow us on Google+ connect with us on Pinterest, add us on Tumblr, and follow us on Twitter.

Don't forget to promote and recommend this post to others, Remember sharing is caring.
For other suggestions and queries that are not related to this post should be forwarded to us through the contact form or better still you can get in touch with us on WhatsApp with this number +2348163702703.

Enjoy and have fun!

©2017, copyright Ogunleye Peter Opeoluwa
Admin @Idea4novice : Tech Weblog On How Tos, Tips And Tricks

Labels: , ,

Thursday, 8 August 2019

How To Fix Android Device Not Ringing Out Problem

Fix Android Device Not Ringing

It's always annoying having to deal with a lot of Missed calls on your phoneespecially from relatives and close friends, but, in most cases, there’s always an easy way of fixing

Should in case you can neither make or receive calls with your phone, there are other solution tips you can follow so as to solve the problem it might not even require much technicality.

What Causes Android Phones to Stop Ringing?
When your Android phone isn’t ringing, there are several possible causes.

In the worst scenario, the phone might be physically damaged or infected with some kind of malware not necessarily hardware problem.>

Most likely, however, it’s possible that you’ve unintentionally activated the silent mode on your phone, unknowingly left it on airplane or do not disturb mode, sometimes having an active call forwarding on your device might lead to not been aware of certain calls.

Another section to look into is that there might be an issue with a third-party app you've installed on your smart device.


How to Fix Android Phone Not Ringing Out Issue

Android Device Volume

First check your volume settings so as to ensure it's at it maximum volume. On most Android phones, there are four sliders: media volume, call volume, ring volume and alarm volume. Ring volume is what you need to adjust.

Call volume adjusts sound during a phone call conversation. Can you hear other types of audio, like music, videos, or alarms? Try switching to a different ringtone.

If you’re using a third-party ringtone, try one of the built-in options.

Check to confirm whether your device is not in flight/airplane mode.

Android Flight Mode

When this mode is enabled, phone calls are automatically sent to voicemail.


You can check this by pulling down from the top of the phone's screen to access Quick Settings or by going to Settings > Network & internet > Airplane mode.

Make sure it's toggled off, or in certain phone by long pressing switch on/off button.

Editors PickHow To Easily Recover Deleted Or Lost Data On Rooted Android Device.

How To Receive Android Smartphone Device Notifications On A Computer Using Desktop Notifications

Also ensure that  Do Not Disturb is disabled. When this feature is on, you won’t be able to receive any notifications including incoming calls.

Do Not Disturb

It's also necessary to check that Do Not Disturb is not set to turn on automatically at certain times of day by going to Settings > Sounds > Do Not Disturb > Turn on automatically.

Disable Do Not Disturb On Android

Check that call forwarding is turned off. Some apps, such as Google Voice, use this feature to forward voicemails.
Cancel Call Forwarding On Android

Ensure that your calls aren’t being forwarded to a third-party calling app, such as Skype. Some older Android phones have a call forwarding settings.

For newer models, go the app settings.

If none of the above listed is the problem of your device, Try to restart your phone.

Recent ArticlesHow To Get Unlimited Data Bonus On MTN With My MTN App

How To Get Free USA Phone Number In Nigeria

Doing so fixes many problems even if you never find the cause.

Sometimes Android phones can get infected with malware. There are a few steps you can take to remove malicious apps from your device.

Rebooting your phone in safe mode is a good way to identify issues.

Try doing a factory reset, which can take care of removing malicious apps and other in truncating  data.

Make sure to back up your phone before doing so in order not to loss some of your important files and documents.

If all else fails, the cause of this issue might be due to physical damage. Contact the device manufacturer or carrier about getting it repaired if possible, or getting a replacement.

Once you’ve fixed the issue, do a security check up on your device.

Check that your phone has the latest security updates, uninstall unnecessary apps and data you're not using, and ensure you only download apps and files from trusted sources.

If this tutorial is helpful or you have any other issue feel free to let us know through the comment form below...

Never miss out any of this blog articles, Receive our regular updates by joining our mailing list, connect with us on facebook, follow us on Google+ connect with us on Pinterest, add us on Tumblr, and follow us on Twitter.

Don't forget to promote and recommend this post to others, Remember sharing is caring.
For other suggestions and queries that are not related to this post should be forwarded to us through the contact form or better still you can get in touch with us on WhatsApp with this number +2348163702703.

Enjoy and have fun!

©2017, copyright Ogunleye Peter Opeoluwa
Admin @Idea4novice : Tech Weblog On How Tos, Tips And Tricks

Labels: , ,

Saturday, 3 February 2018

Check Out Infinix Note 4 X572 Will Be Getting Android 8.0 Oreo Update Soon

Check Out Infinix Note 4 X572 Will Be Getting Android 8.0 Oreo Update Soon

Just of recent Infinix Mobility have announced they are working on an Android Oreo update for the popularly launched smartphone, Infinix Note 4. Honestly most Infinix note 4 users are very pleased with this news, If you are a Note 4 Users – get ready in receiving.

How To Easily Unsubscribe From All Unwanted Email Subscriptions

Reserved keyword in modern c++

Android 8.0 Oreo Beta soon. As the rollout will start anytime soon. Infinix has always been at the leading position of smartphone manufacturer that often release updates for their devices and just as they release Nougat update for infinix Note 3 some months after it was launched, Infinix Note 4 (X572) which was launched early last year will be getting the new Android 8 Oreo OS version.

Five Proven Ways To Maintain And Improve Storage Space on Your Android Device

Check Out The Full Specifications Price And Features Of Blackview BV7000 4G

They are currently working on it and it will be released very soon. You can check out the specs of the device here. Unlike Tecno, iTel, Gionee smartphone manufacture which hardly release an OS update for any of their prominent devices. Even the widely used and popular Gionee M6 and other top TECNO devices have not gotten any new OS update.

Although Infinix Mobility has not announce the date they will be rolling out the update but we know it should be out soon.  other infinix users should stay alert as it might be hitting your model of device in near future. Kindly subscribe to our newsletter to get updated as soon as the update gets released.


Enjoy and have fun!

©2017, copyright Ogunleye Peter Opeoluwa
Admin @Idea4novice : Tech Weblog On How Tos, Tips And Tricks

Labels: , , , ,

Friday, 2 June 2017

Five Proven Ways To Maintain And Improve Storage Space on Your Android Device

Five Proven Ways To Maintain And Improve Storage Space on Your Android Device

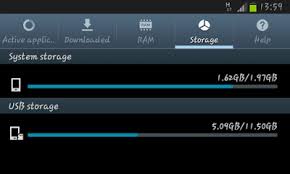
Limited storage space might be a barrier if you the type that love downloading videos, music, files with large size and lot of applications on your Android devices. The more files you have on your phone the more space it consume, despite the facts that there are a lot of decent smartphone nowadays with good inbuilt storage space. The most annoying thing I bet any android user can ever experience either when you want to update your app or download a file and you get ‘insufficient memory’ or ‘Android internal memory is full’. It can be so frustrating.

• How To Embed Any Webpage On Blogger Using HTML Iframe

• How To Set Up And Integrate Facebook Messenger On Blogger For Live Chat

But there is always a way out of every predicament. The below simple steps will guide you through on how to get more space on your Android device.

1. Clear Cache + Data: Cached files are little bits of data stored by apps every time you use them. You can do this manually for individual apps by going to Settings > Storage > Apps then click on clear cache.

2.Clear Old Downloads:
Every time you download new apps, games, videos and PDF or other document from the web it is stored in your Downloads folder, but the chances are you probably don't need it anymore. If you have a File Manager app installed on your device use this to browse your Downloads folder, locate and delete anything you don't need.

3. Back up photos and video to Google Photos, then delete them from your phone:
Photos and video are one of the biggest space hogs on any Android phone, and more so as their integrated cameras come with increasingly high megapixel counts.

Download the free Google Photos app from Google Play, then in the Settings menu select to back up all photos and video over Wi-Fi. Once the media has transferred you can delete them from your phone.

4. Move apps and files to SDcard:If your phone supports sdcard, move all your apps and files to SD card; any or use apps2sd to move difficult apps to SDcard.

And for those using Android 6.0 Marshmallow, you can combine your SDcard memory + phone storage. See steps below;

Step 1: Make sure the microSD card is okay, well inserted inside your Android Marshmallow running smartphone and is in good working condition.

Step 2: Navigate to your smartphone’s ‘Settings’ and go to ‘Storage and USB’ inside the settings menu.
Step 3: Locate your external microSD card under the ‘Portable storage section and tap on it.

Step 4: Post jumping in the external microSD, locate the three-dot menu at the top-right and hit on ‘Settings’

• How To Check Whether Your Android Smartphone Is Running On 64-bit or 32-bit Operating System

• How To Automatically Delete Duplicate Files On Android Device.

Step 5: Now here you will get four options - Eject, Format, Format as Internal and Movie Media. Choose ‘Format as internal’.

Step 6: You will not be greeted by a screen saying that your microSD card will be erased completely and will only work on that particular device. Tap on ‘Erase and Format’.

Step 7: After finishing the process, your external SD card will now work as your internal storage.

5. Use lite apps: With recent improved technology Android developers are now releasing two variants of their apps, one standard, and the other lighter, which not only consumes less cellular data, but takes up less space on your phone, too.
Some of those apps that consume space like Facebook, messenger, Youtube and opera have lite apps, consider switching to them.

Well, this is just few of those ways you can free up and improve the storage space on your Android smartphone, what is your preferred method of freeing up space?

Labels: ,

Tuesday, 2 May 2017

How To Fix Tablet And Smartphone Slow charging Problem.


How To Fix Tablet And Smartphone Slow charging Problem.

Fix Android Smartphone Slow Charging Problem

Slow charging is a very common issue that affect all devices (not just limited to phones or tablets) which uses micro USB port to receive electric power to charge the device.

It's a very annoying problem which I also experience on my Samsung galaxy A9 which was charging very fast (probably three hours before fully charged) by the time I bought the phone, But as time goes on like few month after the purchase the full charge time increases from 3hrs to 5hrs and now to 6½hrs which left me with no choice than to charge it over night before going out the following day.

Recommended : How to Customise WhatsApp Notifications For Every Contact.

How To Automatically Delete Duplicate Files On Android Device.

How to Create an Archive Page/List for Blogger

This keep me wondering if the phone is faulty,? or is my charger not working properly anymore? But after few days of research I was able to come up with a list of solution that really work for me,which I will be sharing with you today.

* HOW TO FIX SLOW CHARGING ON YOUR ANDROID DEVICE

There are many factors that are responsible for Android device slow charging issue. I have highlighted the most common ones. Perform the steps mentioned below until your problem is sorted.

• REPLACE THE CHARGING CABLE

micro usb charging cable

Mostly, it is the micro USB to USB cable that causes slow charging. These cables lose their efficiency over time and therefore can’t provide enough current (amperage) to charge the phone/device.
Changing the Micro USB to cable can be of great help. If you are using iPhone, change the lightning cable.
Tip: When purchasing cables, always go for slightly thicker ones (higher gauge). They can transfer high current without breaking down.

• USE AIRPLANE MODE

Activate Aeroplane Mode To Boost Phone Charging

Airplane mode completely turns off wireless connectivity (Cellular and WiFi) of your device.

Surprisingly, Airplane mode on your smartphone can significantly improve the charging process by reducing cellular network signal consumption rate of your device thereby  decreasing the charging time. The only drawback and disadvantage is that you will not be able to communicate with others through mobile network and internet.

• GO FOR  A CHARGER REPLACEMENT

Charger Replacement

If after changing the charging cable doesn’t work. It’s time to change the charger. Variety of USB based chargers available in the market are of low quality, so getting a good charger is a bit difficult.
A good charger must have following specifications: 5v 2.0A – This is the standard. Get a charger which has an output of at least 2.0 ampere. You read the information written on the front/back of the charger before buying it.

Avoid chargers with detachable USB cables, their ports/connections become lose after frequent usage. It is better to get charger with fixed micro USB output.

Warning: Refrain from using multipurpose chargers that come with universal connectors

• AVOID CHARGING FROM POWER BANKS, LAPTOP OR PC

While they can charge your device using USB ports, it is still not advisable to do so. USB ports on Computers and PC are meant for transferring data, they do not offer enough current charge a device. Hence, slow charging.

Your Should Also Read : How To Change Email Delivery Time On Feedburner

How To Run Multiple Accounts Of The Same App On Android Device

How To Create Video Collage To Share On Instagram And Other Social Networks.

Output current for USB in ideal scenario:
USB 2.0 can provide up to 500mA
USB 3.0 can provide up to 900mA
If you don’t have a charger nearby and using PC USB port as a last resort. It is very advisable to connect your device to a USB 3.0 (blue) port.

• STAY AWAY FROM PRESSING PHONE WHILE ON CHARGING


Pressing  your phone while charging may cultivate a negative impact on your Android’s battery life. It puts battery under heavy load and cause the device to heat up. Do these things before you put your phone to charge: Close/End all the applications that are running Turn off WiFi, Bluetooth and GPS, put your smartphone airplane mode, it will turn off all the wireless/cellular connectivity. Only do this if you’re not expecting any communication.

• REPLACE YOUR SMARTPHONE BATTERY

Replace Smartphone Battery

If your device is up to a year and it quickly drains battery after a long charging session. Chances are your device battery is dying a slow painful death. Get a new battery from Original Equipment Manufacturer (OEM).If they discontinued the production of phone/battery. Don’t worry, you can still find replica batteries. Proceed with caution though.


• CHANGE THE ANDROID/IOS VERSION OF YOUR DEVICE

Change The Android/ios Version Of Your Device

If you recently upgraded your device’s operating system through System Update (i.e. Android Marshmallow) and experiencing quick battery drain or slow charging. It means the new OS is buggy or incompatible with your device. Look for steps to downgrade the version or wait for a bug fix patch

Labels: , ,

Saturday, 29 April 2017

How To Automatically Delete Duplicate Files On Android Device.


How To Automatically Delete Duplicate Files From Your Android Device

Search Dupicate File

Almost every android smartphone users experience file duplication on their device especially on SD card.
This duplicated file may occur due to several reasons. That result to SD card storage space being used up as a result of the large size of the duplicate file. Most common occurrence of this is the extracted files, when we extract files sometimes they do duplicate or even stop while extracting.

RecommendedAirtel Nigeria Has Finally Set To Roll Out Its Own 4G Network.

How to Customise WhatsApp Notifications For Every Contact.

When this happens the extracted part will be saved which is totally useless and consumes lots of space. Another instance could be as a result of a faulty memory card or even your Device, it can also be as a result of WhatsApp users sending the same files multiple times especially in a group chat.

I've had an experience of duplicate file on my Samsung galaxy A9 too which gave me a lot of problems and confusions with storage. In some situations where I want to download a video tutorial of large size, I so shock to receive a notification that my storage space is too low for the file I wanted to download, I was then asking myself what could be the problem with my phone?  sadly enough i found out my storage is full but still can't find the reason for it.

It was later that evening that I noticed that  it was due to my faulty memory card which continuously duplicated files and saved them in a secret folder. Although after performing this tutorial am about to explain I had to dispose the SD card avoiding future occurrences.

It's so easy to remove duplicate file on android device and the good thing about it is that it doesn't require rooting your device.

Just follow the simple tutorial below.

Requirement

1. Your Android Device
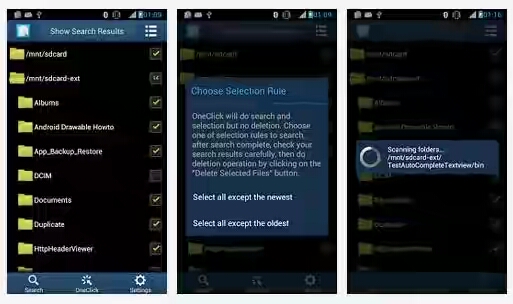
2. Go to play store and install Search Duplicate file, After installing the app, follow the process below to start the App and clear duplicated files on your device.

Features Of Search Duplicate File Removal


• OneClick to search and select

• Save/load search results

• Specify path/size to search for

• Best App to Find Duplicate Photos on android

• Support searching hidden files/folders

• Support internal/external SD card

• Support previewing photo/apk/storage

• Notify you when a search complete

• Search results are grouped by file size

• View file content before deleting/excluding it

• Batch select/deselect files/groups

• Batch delete/exclude files/groups

• Batch expand/collapse groups.


How to Clear Duplicated Files With Search Duplicate Files

1. After downloading and installing this app from playstore .

2. Launch the app and allow it to access your files

3. After it done with accessing your files, it automatically marks all folders where you saved a file.

4. Now look at the lower part of your screen and click on the search icon.

5. Immediately it begins to scan files and once done.

6. It displays duplicated files and automatically marks all of them.

7. Now you can check the files to make sure you don’t lose important files, but if you are sure that major documents are safe and not saved with the same name just hit the delete of bin icon to delete these files and save some space for on your device.

You Should Also ReadHow to Use CLONEit to Copy Apps And Data From One Android to Another

How To Show And Display Music Lyrics On Android Stock Music Player

8. Once they are deleted scan again to confirm and see the magic. Remember you have to set the storage in which you are searching for duplicated files from. That is from your SD Card or your device storage. Once that is done it free up some space for the installation of useful files.

Besides deleting duplicated files some other things can cause your device memory been full. But from what I noticed saved data from various social media apps, utility apps causes this. So when you see that you really do need space, you can clear the cache of a huge app or data.

If you have any question feel free to ask by making use of the comment box below.
At idea4novice we are committed to giving you the best when it comes to tutorials on how tos, Androids and lot more.
Enjoy!

Labels: , ,

How to Customise WhatsApp Notifications For Every Contact.


How to Customise WhatsApp Notifications For Every Contact

Customise WhatsApp Notification


When it comes to social networking and instant messaging service, WhatsApp has become one of the most popular in the world and although it comes with its own bits of drawbacks, the service has been updating ceaselessly to be at par with the competition.

Being the goto messaging service for most android users, all of us get tens and hundreds of messages every day on WhatsApp.
While some of them are from people we wish to talk, more than often it’s some group message crowding your notification bar.

RecommendedHow To Run Multiple Accounts Of The Same App On Android Device

How To Create Video Collage To Share On Instagram And Other Social Networks.

For instance, if you’re working and waiting for a reply from a particular contact, it makes sense to assign a separate message tune or notification light for that contact.

This way you’ll only interrupt your workflow when you’re sure it’s a message you wish to read and reply immediately.
Not only during work but otherwise too, if you don’t wish to be bothered by notification from all your contacts but only a few specific ones, then assigning custom tune, notification light colour or vibration setting is recommended.

How to Set Customise Tone, Vibration and Notification Light?

You’ll need to go to the contact’s profile page on WhatsApp — view profile. You’ll find ‘Custom Notifications’ option below the Mute toggle button.

Customise WhatsApp Notification


The new window will show you ‘Use custom notifications’ toggle button on the top, which you’ll need to check in order to be able to customise message and call notifications on WhatsApp.

Customise WhatsApp Notification


Users can customise message notification tone, vibration (none, short, long or default), popup notification (control whether you see a popup always, or when screen is on or off), and notification light.

You Should Also ReadHow To Convert Personal Facebook Account To A Page And Get More Likes

Master Card Introduces New Credit Card with inbuilt Fingerprint Scanner

Users can also customise WhatsApp call ringtone and vibration duration for the particular contact.

Customise WhatsApp Notification


Once custom notifications are enabled, you’ll see ‘Enabled’ written below the ‘Custom Notifications’ option (as seen in the image above).
Note that you’ll have to customise these settings for each and every one of your contacts individually.

Create Shortcut for a Contact
You can also create a shortcut for a contact that you frequently talk to on your home screen. This is especially useful if you don’t wish to open the WhatsApp app to read their messages or write to them;
Here’s how: Open the chat window of that contact.
Tap on the ‘three-dot’ menu on the right-hand corner of the app.
Scroll to the last option — ‘More’ — and tap.
Find ‘Add Shortcut’ — the last option in the new menu — and tap.

Customise WhatsApp Notification

You’ll see a pop-up notification that a chat shortcut has been added to the home screen — name and picture of the contact in a neat round bubble.
Clicking on this icon will take you straight to the chat window of the respective contact.

Conclusion
With this simple and straight forward tutorial am really sure that you can now easily customize your WhatsApp notification. If you have any other question concerning this post don't hesitate to ask using the comment box below.

Happy sharing!

Labels: , , , ,

How To Create Video Collage To Share On Instagram And Other Social Networks.


Video Collage


Have you ever need an app that can help in collaging your videos the way your picture are been collaged. Guess it will be perfectly awesome to have such an app in which one can explore and test his creativity be creating a video collage and sharing it on social media like Facebook and Instagram.

RecommendedMaster Card Introduces New Credit Card with inbuilt Fingerprint Scanner

How To Run Multiple Accounts Of The Same App On Android Device

Sadly enough I only saw this feature on Samsung Galaxy S7 which was an built-in feature and i wish other android device comes with the same inbuilt features. So today I will share with you my research on app that can collage videos on android device. Now the thing is, there are quite a few apps that claimed to do the task, but only a few were able to accomplish what I was looking for. So let’s have a look at them.

1. PicPlayPost
The first app that you should probably try is PicPlayPost just go to playstore to install it. The app is free to download, however, the first time you launch the app, it will give you an option for in-app purchase to remove ads and watermark from the processed videos. Although, there’s plenty of time for that, right now it’s time to see how the app works. The first thing you would be asked is to select the frame style and you have plenty of options to choose from, including the ratio of the videos. From what it looks like, you can stitch as many as 6 videos to make a collage.

Picplay post : Android video collage

Having done that, the next thing you will have to do is import videos from the gallery. You can also give background music and a still photo along with the video and that will work too. If things don’t fit in, drag the video inside the frame and zoom in or out. You can also tilt them if you like.

Picplay post : Android video collage

Finally, when everything is set, you can preview the creation and if you like what you see, just tap on the share button to share it on Facebook, Instagram or any other social media platform. Tapping on the gallery option will save it to the device’s internal storage.

You Should Also ReadHow To Show And Display Music Lyrics On Android Stock Music Player

How To Save Mobile Data When Using WhatsApp.

Picplay post : Android video collage

If you ever face any issues while importing video, you can open up settings and select the option Change Video Codec . Here you can import a sample video from your camera and then wait for the app to import codecs to use in the future. Here itself, you can also buy the app’s full version and get an ad-free interface without watermarked videos.

Video Collage for Android


2. Video Collage
The second app you ought to try is Video Collage which is also available on playstore and the biggest advantage you get with this is that you don’t have the watermark on the processed video even in the free version. There are ads, but nothing you can’t live with to support the developers. The only feature missing here is that you don’t have the option to trim and edit the video and they will be imported as it is. So you will have to either live with the stock videos or use an external editor to trim them.

Video Collage

In the app, you can add photos and background music, but in addition to that, there’s also support for text and stickers to make the video look cooler. It’s very easy to work with these additional elements and place them on the videos. Another thing that’s missing when compared to the previous app is the option to select a frame of
different aspect ratio. You only get square frames but they have some nice designs. The rendering also takes longer duration but not significantly.


Conclusion.
So that was how you can create video collages on your Android and make your regular videos awesome for your social network.
If there's any question regard this post don't hesitate to ask in the comment box and lastly always remember to share this blog post with your friends.
Enjoy?

Labels: , , , ,

How To Run Multiple Accounts Of The Same App On Android Device


How to Run Multiple Accounts of the Same App on Android.

Maintaining a dual identity on the internet with android either single or double sim is not quite easy, unlike on a computer and browser where you can sign in to different account and have access to it at the same time.

 Maintaining a dual identity on the internet there can be a lot of reasons for you to be able to access multiple online accounts at once.

Good enough there are some developers like Instagram, who considers and don't regard it as an offense  for users who you and have multiple account, thereby giving a provision to add multiple
accounts from a single app, but then there are the others. WhatsApp, Facebook and lot more who think that it's only proper and more saver for a person to live with a single account, even though he or she might be using a dual SIM phone and can have different business and personal identities.

RecommendedHow To Change Email Delivery Time On Feedburner

How to Use CLONEit to Copy Apps And Data From One Android to Another

There was a method in the past with which one can change the signature of an app and clone it to run multiple instances . But the app is hard to work with (especially with recent security updates to Android) and didn’t give a 100% result. So to make things better, I would like to introduce to you an app called Parallel SpaceSpace which allow you to have access and run two instances of the same app and that too without breaking a sweat.

Using this app, you can run two instances of any app installed in your phone, like WhatsApp,
Facebook, and the good thing about this app is that it doesn't require you to root your device before you can use it and interestingly both of them will work independently. So that means you can have two accounts of WhatsApp, Hike, and even Snapchat. So let’s see how the app works.

How to Set Up And Use Parallel Space

Once you install Parallel Space, it will automatically add Facebook+ and Instagram+ icon in the app drawer along with the Parallel Space app. This app is like a sandbox where you run all
the other apps and just as you launch Faecbook+ or Instagram+ it will ask you to configure a new account. Just think of it as running a browser as a different user and both the app will work in parallel space.

Parallel Space

Parallel Space

After you launch the app, you will see a grid with some default apps . To add a new one, tap on the plus icon at the bottom of the page and you will see a list of all the apps installed on your phone. Just select the one you wish to add and then let the app do its magic.

Parallel Space

Parallel Space

The app will be added to the Parallel Space, and you will be able to configure as a newly installed app. I tried WhatsApp, Uber, Facebook, Messenger and every one of them worked like a charm. There is no limitation on the number of apps you can run in parallel space, and every app will keep on stacking up in the grid.

Parallel Space


All the apps running in Parallel Space will definitely keep working in the background and will be active as long as Parallel Space is active. Therefore, you should make sure that it’s not killed by any of the task killer apps you are using. The app will have high battery usage and will require a lot of permissions, but the battery usage is the combined usage of all the apps that you are running in Parallel Space.

You should also readHow to Create Lite Version App For Blog without Programming Idea

How To Stop And Reduce Overheating Of Smartphone.

How To Setup Custom Robots Header Tags On Blogger

While using the app, I noticed that all the apps in Parallel Space are updated automatically when the base app is updated from the Play Store. If you need to share anything to an app that’s running in Parallel Space, you will have to select that option from the sharing menu and then choose the final app. Under settings, you get the option to invoke the app from the bottom left or right edge and, therefore, makes it easy to launch any of the apps configured in Parallel space.

If you find this tutorial helpful,don't be selfish you can share it with friends by using the share button also if there's any question or query never hesitate to use the comment box below.
Enjoy!

Labels: , , ,

Thursday, 27 April 2017

Full Specification Of Afrione Z1 The First Made In Nigeria Mobile Phone.

Afrione Gravity Z1


Afrione the first made in Nigeria mobile phone

AfriOne Gravity Z1 - Specifications and Price in Nigeria
The AfriOne is a new smartphone manufacturer company, that recently established its assembling plant in Lagos. At the opening event, the company announced a new smartphone which is the AfriOne Gravity Z1.

RecommendedHow To Setup Custom Robots Header Tags On Blogger

How To Change Email Delivery Time On Feedburner

How To Get 500mb for N200 and 150mb for N100 on Airtel

Below is the specification of the afrione gravity Z1
 The Gravity Z1 features a 5.5-inch IPS and a 3000 mAh battery.
Unfortunately, AfriOne has not yet announce the full specification of the Z1.
But you can have a look on the few review of the AfriOne Gravity Z1 specifications that are available. We will update
the specs as we get our hands on more details.
AfriOne Gravity Z1
Specifications
Network and Software
GSM : GSM 900 / 1800
3G : HSDPA 2100
4G : No
SIM Type: Dual Micro SIM
OS : Android OS
Design
Dimensions : mm
Weight : g
Display : 5.5-inch LCD IPS touchscreen
Sensors: Accelerometer, Ambient Light, Proximity
Build :
Colours : White
Inside
Processor Type:
Processor Name:
Graphics Processor:
RAM : 2 GB
Internal Storage: 16 GB
External Storage: microSD, up to 32 GB
Camera
Rear : 8 megapixels, autofocus, LED flash
Video recording : Yes
Front-facing : 5 megapixels with soft flash
Multimedia
Music Support : AAC, AMR, MP2, MP3, M4A, MKA,
Loudspeaker : Yes
Video Support : MP4/MPEG4/H.263/H.264 player
FM Radio :
Connectivity
Bluetooth : Yes
WiFi : Wi-Fi 802.11 b/g/n, Wi-Fi Direct, hotspot
GPS : Yes
USB : microUSB
Miscellaneous
Charging :
Battery : 3,000 mAh
Announcement : April 2017
Availability : April 2017
Launch Price : To Be Announced (TBA)
Disclaimer : While we take the pains to ensure accuracy,
we can not guarantee that the information on this page is
100% correct.

Labels: , , , , ,